
How can I set up an activity calendar in Dynamics 365
Posted on 8th September 2020 at 11:17
One of the areas where Dynamics has fallen down on over the years was having a Calendar display. Before Dynamics I had worked with GoldMine and Act! – both of which had great calendars.
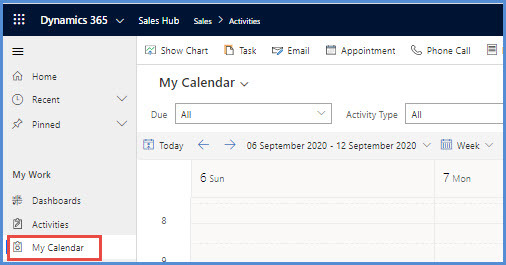
If you are using Dynamics 365 to record activities (appointments, tasks and phone calls) these are easily visible on the timeline of the Contact, Lead or Account. The Activity Views will show a list of activities but to really see your bookings and available time a Calendar is essential.
I have known for a while about the Custom Controls available but hadn’t got around to actually setting it up, so when I saw a blog by Amey Holden covering exactly this I checked it out.
I’ll summarise here the steps to be taken, but if you need more detail do check out Amey’s blog or contact us at CRM365 Solutions.
Create your View
1. First think about what you want in the Calendar. Just Appointments? All Activities? Create an Activity View to show this.
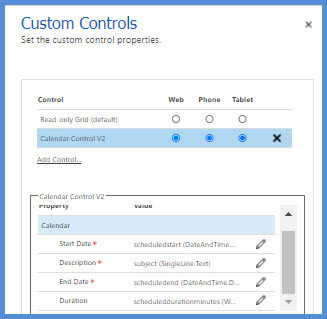
2. Open the View from the Classic solution customisation and add a Custom Control. Calendar Control V2 is the better one to use. Add this to Web, Phone and Tablet.
3. Map the fields to display, which should be
a. Start Date to ScheduledStart
b. Description to Subject
c. End Date to ScheduledEnd
d. Duration to ScheduledDurationminutes.
4. Save & Publish the customisation
Add to Site Map
Now, you could just select the View from the View selector in the same way as any other View, but to make it more obvious to users that there is a new Calendar View – why not add it to the Site Map?
5. Add the View to your model-driven app
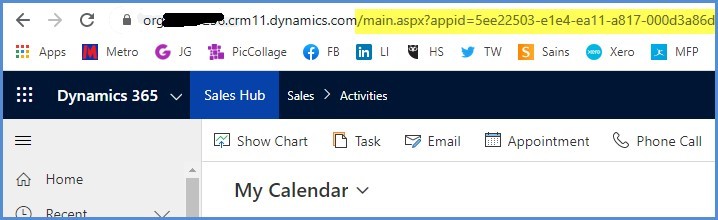
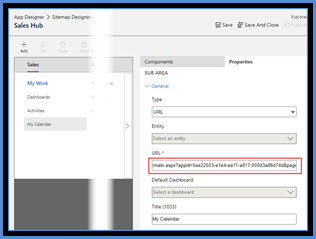
6. From the View copy the URL after .com (including the / ).
7. In the App Designer, edit the Site Map and add the Sub-Area as a URL and paste in the URL copied earlier.
8. Save & Publish your site map.
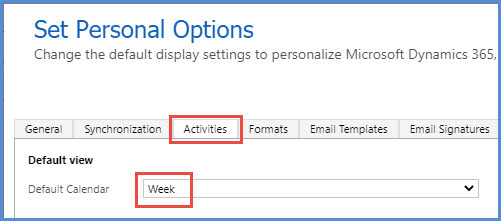
Changing the Default View
The default View is determined from the setting in your Personalization Settings – so it is a simple change to default the calendar to Week instead of Day.Click on this text to edit it.
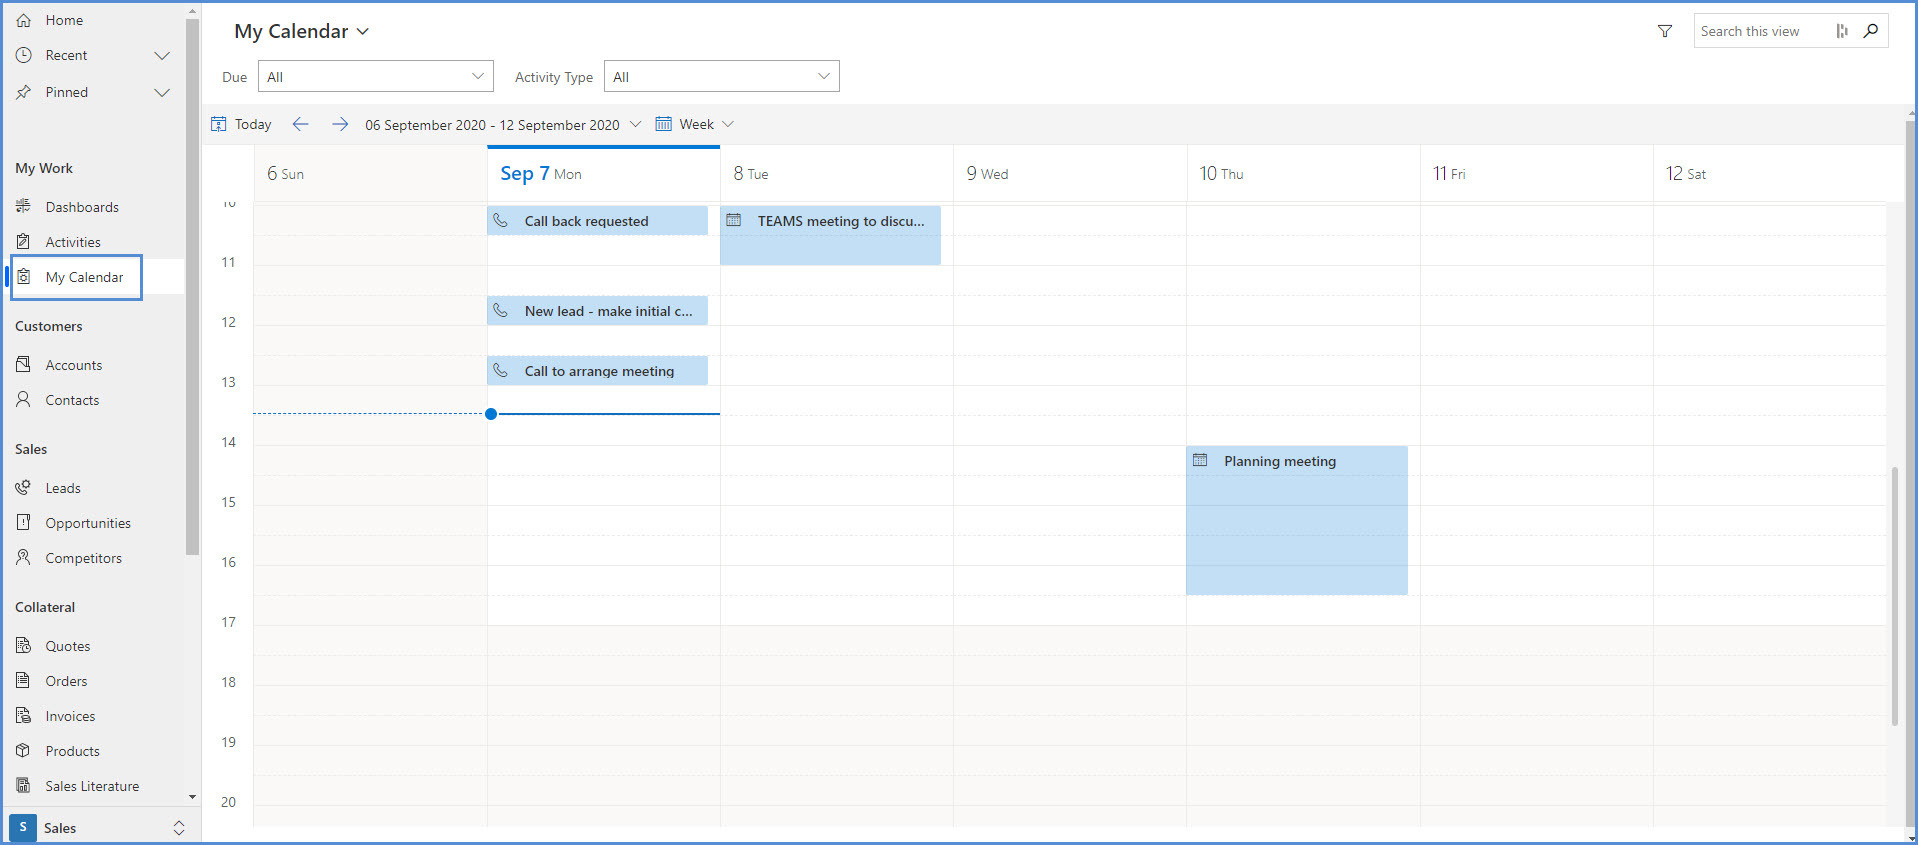
Using your Calendar
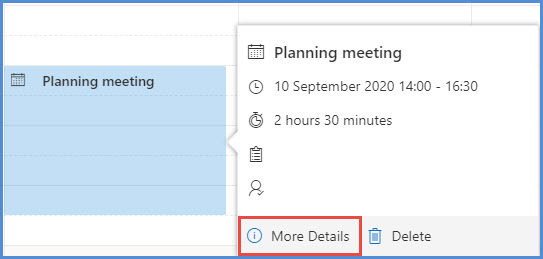
When you click on an activity in the Calendar more information is displayed. Then click on More Details to open the activity for updating, completing etc.
Tasks and Phone Calls - Due Date vs Scheduled Date
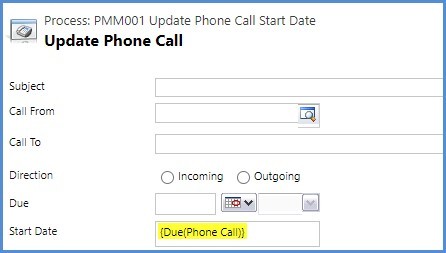
When we added the Custom Control, we mapped the properties to the Scheduled Date and Time, however with Phone Calls or Tasks they are usually created with a Due Date. If this Due Date is later changed the Scheduled Date does not change.
So, just to finish this off neatly, a simple Realtime Workflow can update the Scheduled Date and Time if the Due Date and Time changes. You will need to create one for Phone Calls and one for Tasks.
Trigger on a change to the Due Date field and then copy the Due Date field to the Start Date field.
Save and Activate your workflow.
Share this post: